
Claude Design is Done... The BEST FREE Claude Design Alternative (Unlimited & Local-First)
An archived Gemini CLI walkthrough from an older SankiWork release, plus the current replacement: configure Google Gemini through BYOK, which runs through the isolated OpenCode adapter.
This page documents the Gemini CLI workflow Sandeep Singh used in his May 2026 walkthrough. That direct runtime has since been retired from SankiWork. The archived sections below explain what appears in the recording; they are not current setup instructions.
To use Google Gemini models in the current release, configure Google Gemini as a BYOK provider. SankiWork executes configured BYOK providers through its isolated OpenCode adapter; it does not detect or invoke the gemini executable.
Current setup: Google Gemini through BYOK
- Create a Gemini API key in Google AI Studio and check Google’s current pricing and free-tier terms.
- Open SankiWork Settings, choose the BYOK execution path, select Google Gemini, then enter the API key and model.
- Test the provider, save it, and select that BYOK runtime for the project. The provider call is isolated behind OpenCode rather than a direct Gemini CLI process.
The cost story still depends on the provider plan you bring: SankiWork is free, while Google controls Gemini API quotas and billing.
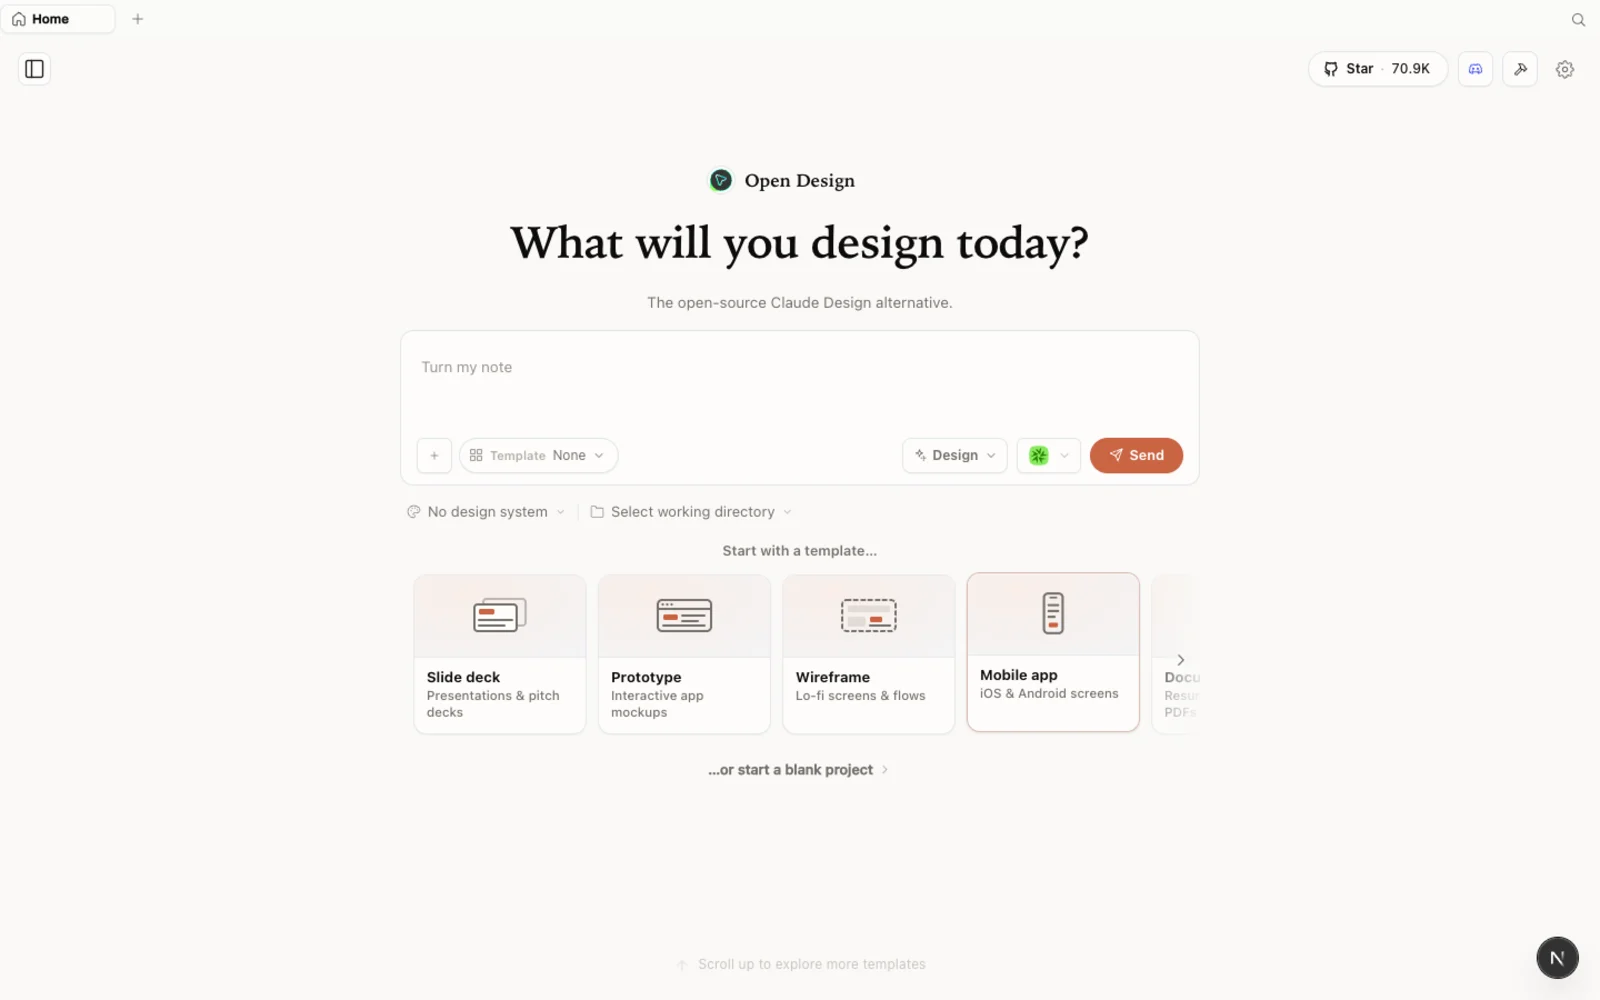 The SankiWork workspace — local-first, and driven by whichever coding agent you connect.
What is SankiWork?
SankiWork is an local-first design platform that runs on top of the coding agent you already use rather than locking you to one model provider. It is “bring your own agent”: Claude Code, Codex, Cursor, GitHub Copilot, OpenCode, Qwen, and many others can drive generation. You can also configure Google Gemini and other providers through BYOK.
A few things that make it worth a look:
- Free to run locally — bring your own agent and keys; there is no subscription for the tool itself.
- Runs locally — your projects live in folders on your own machine, not in someone else’s cloud.
- Agent-pluggable — 21+ coding agents are supported, and configured BYOK providers use the same project workflow.
- More than prototypes — prototypes, live artifacts, slide decks, magazine layouts, image generation, and even video, all from one workspace.
- Built-in starting points — branded design systems and templates ship in the box, so you are never staring at a blank canvas.
It stands on its own merits: a local, model-agnostic design workspace. A provider free tier can make experimentation inexpensive, but availability and quotas belong to that provider.
Before you start
You have three ways to install SankiWork. Pick the one that fits you:
| Path | Best for | Requirements |
|---|---|---|
| Desktop app | Most people — zero config | None. Just download and open. |
| Run from source | Developers who want to read or modify the code | Node ~24, pnpm 10.33.x |
| Install into your agent | People who live in the terminal | An existing coding-agent CLI |
The desktop app is the recommended route today — no Node, no pnpm, no clone. Sandeep downloads the installer for his platform (a .dmg on macOS, a setup.exe on Windows) straight from the latest release.
Step 1 — Install SankiWork
Option A — Desktop app (recommended, zero config)
Go to sanki-ai.cloud and click Download desktop. Builds are available for macOS (Apple Silicon and Intel), Windows (x64), and Linux (AppImage). After installing, the app auto-detects every coding-agent CLI already on your PATH and loads the built-in skills and design systems for you. On first launch you land on the connect screen, where you choose a local CLI or paste your own API key.
Option B — Run from source
If you would rather run it from the repository, you only need a handful of commands:
git clone https://gitea.com/Sanki5211/sankiwork.git
cd sankiwork
corepack enable && pnpm install
pnpm tools-dev run web
Then open the local URL it prints — the port is assigned dynamically, so use whatever address appears in your terminal rather than a fixed one. You need Node ~24 and pnpm 10.33.x; Corepack will select the pinned pnpm version for you.
Option C — Install into your coding agent
To use SankiWork without ever opening the GUI — calling it as a skill or MCP server inside your agent — run:
sw mcp install <agent>
# <agent> = claude | codex | cursor | copilot | opencode | kiro | …
Then, inside the agent, just ask: Use sankiwork to generate a landing page with a modern minimal design system.
Archived workflow: connect Gemini CLI in the older release
The steps in this section describe the release shown in the embedded video. They do not work in current SankiWork releases; use the BYOK setup above instead.
At the time of the recording, this was the step that made the workflow free. SankiWork drove Gemini CLI and used its account-level allowance.
Why did the recording use Gemini CLI? Two reasons, as Sandeep put it: the Gemini models held their own against the rest, and the free tier was generous. Those account-level CLI terms are historical context, not the current SankiWork integration contract.
- Install Gemini CLI. Follow the install command on the Gemini CLI homepage (Homebrew on macOS and Linux, or the documented installer elsewhere). Any terminal works.
- Run
geminiand authenticate. Launch it, trust the working folder when prompted, then choose Sign in with Google. Your browser opens for a two-click Google login and reports success. Restart Gemini CLI; you should see the active model and0%quota used. - Point that older SankiWork release at it. In the recorded build, restarting SankiWork made Gemini CLI appear as an available agent for connection testing.
The recording also showed API-key and media-provider settings. In the current release, use the Google Gemini BYOK path documented above for Gemini text generation.
Explore the workspace
SankiWork keeps your work project-scoped: each project lives in its own folder, and switching folders switches projects. Inside a project you can create prototypes, live artifacts, slide decks, images, and even video and audio — not just UI.
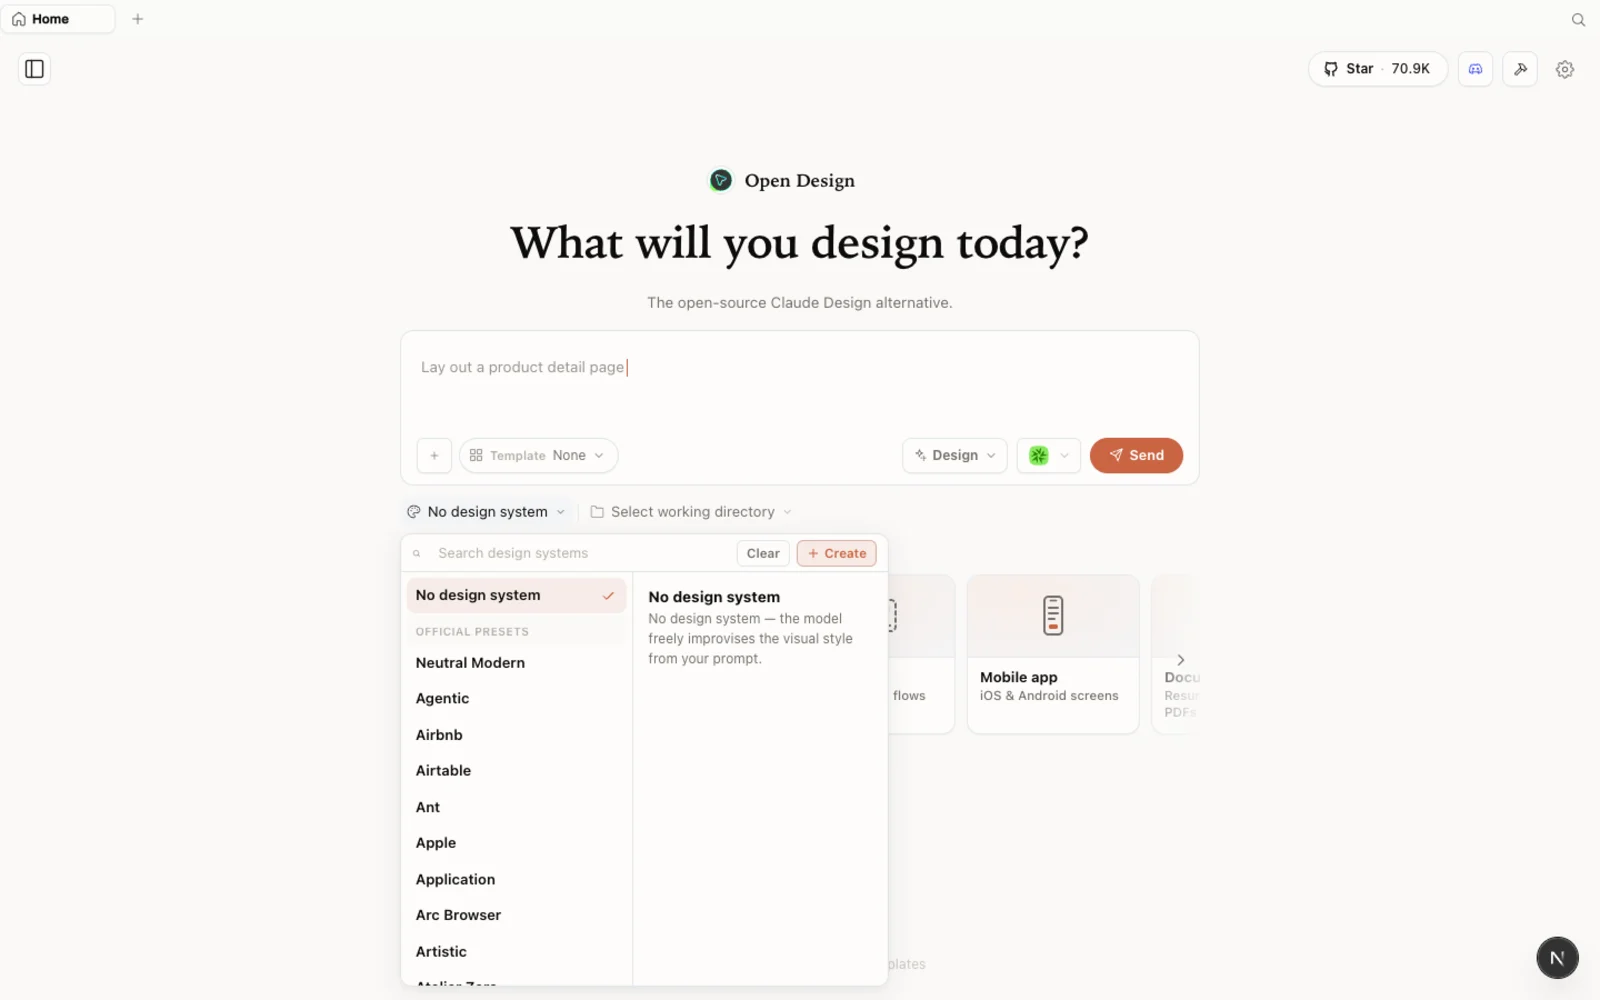 The design-systems library — branded starting points you can preview and snap into any project.
The built-in design-systems library gives you branded starting points to preview and reuse, so you are not blocked on defining tokens before you can begin. You can also bring your own design system, import an existing Claude Design project, or start from nothing and let SankiWork infer sensible defaults.
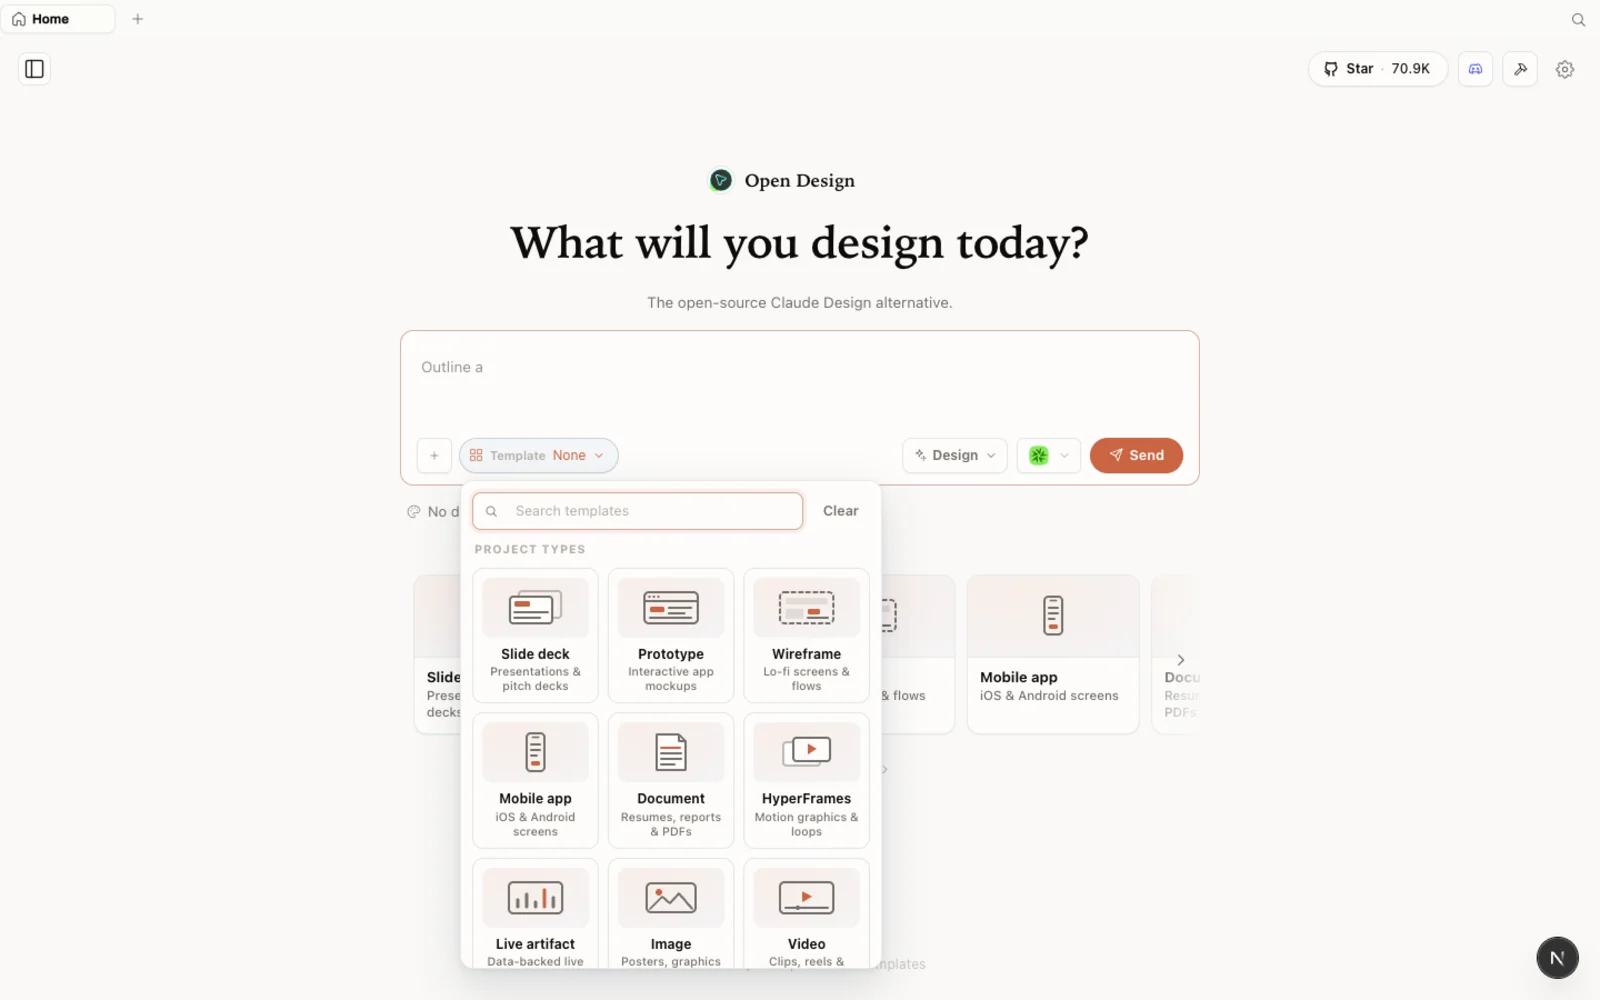 Templates: prototype, slide, image, and video starting points — filter by type and fork to begin.
The templates library reaches beyond brand systems into prototypes, slides, and both image and video generation. Filter by type and fork any one as your starting point. You can browse the full plugin library on the web at sanki-ai.cloud/plugins before installing anything.
Archived build flow shown in the video
With Gemini CLI connected in that older release, Sandeep ran this build flow:
- Create a project. Name it, pick a design system that suits the look you want, and choose High fidelity so you see the real thing rather than a wireframe.
- Write the brief. Instead of one of the suggested prompts, describe what you want — Sandeep asks for a landing page. You can also attach a screenshot of a layout you like and ask SankiWork to follow that theme.
- Answer the clarifying questions. The agent asks smart follow-ups: single landing page or landing-plus-pricing, responsive surface, who it is for, a visual tone (Sandeep chooses a modern, minimal, Linear/Vercel feel), and any brand colors or fonts. You can leave fields blank or let it pick a direction for you.
- Pick a visual direction and generate. Choose one of the proposed directions, send, and a few seconds later the styled landing page appears with the sections you asked for.
- Iterate by prompting. Want to swap a logo, add a missing icon, or extend the FAQ? Just describe the change and send. If an edit knocks something out of place, a follow-up prompt nudges it back.
When you are happy, open the design files, inspect the source code, edit layers manually if you want, then export — PDF, PPTX, a compressed bundle, or a deploy to Vercel.
In the recording, Sandeep built two prototypes with several iterations and reported using about 2% of that day’s Gemini CLI allowance. That measurement describes the old workflow and is not a promise about current Gemini API quotas.
Notes from the archived Gemini CLI workflow
- The recording signs in to Gemini CLI with a Google account. Current SankiWork releases use a Gemini API key through BYOK instead.
- Start with high fidelity when you want to judge the real design; drop to wireframe only to block out structure quickly.
- The recording checks
statsin Gemini CLI. For the current BYOK path, inspect usage and quotas in the Google provider console. - Your designs stay with the project folder — organize work by running SankiWork against the right directory.
- You do not need a design system to start. Begin from a built-in one, import a Claude Design project, or let SankiWork infer defaults.
FAQ
Is it really free? SankiWork is free to run locally with your own agent keys. Gemini API usage depends on Google’s current free-tier and billing terms; the video’s roughly 2% figure came from the retired direct-CLI workflow.
Which coding agents does it support? 21+ agents, including Claude Code, Codex, Cursor, GitHub Copilot, OpenCode, and Qwen. SankiWork detects supported CLIs already installed on your machine and also offers configured BYOK runtimes.
Do I have to use Gemini CLI? No. Current SankiWork releases do not expose Gemini CLI as a direct runtime. Choose a supported local agent, or configure Google Gemini through BYOK.
Do I need a design system before I can start? No. SankiWork ships branded design systems and templates as starting points, and you can import an existing design system or let it infer sensible defaults.
This written guide is based on Sandeep Singh’s hands-on walkthrough. Watch the full video above, and subscribe to Sandeep Singh for more practical AI-tool tutorials.